1994 Hamer Special FM
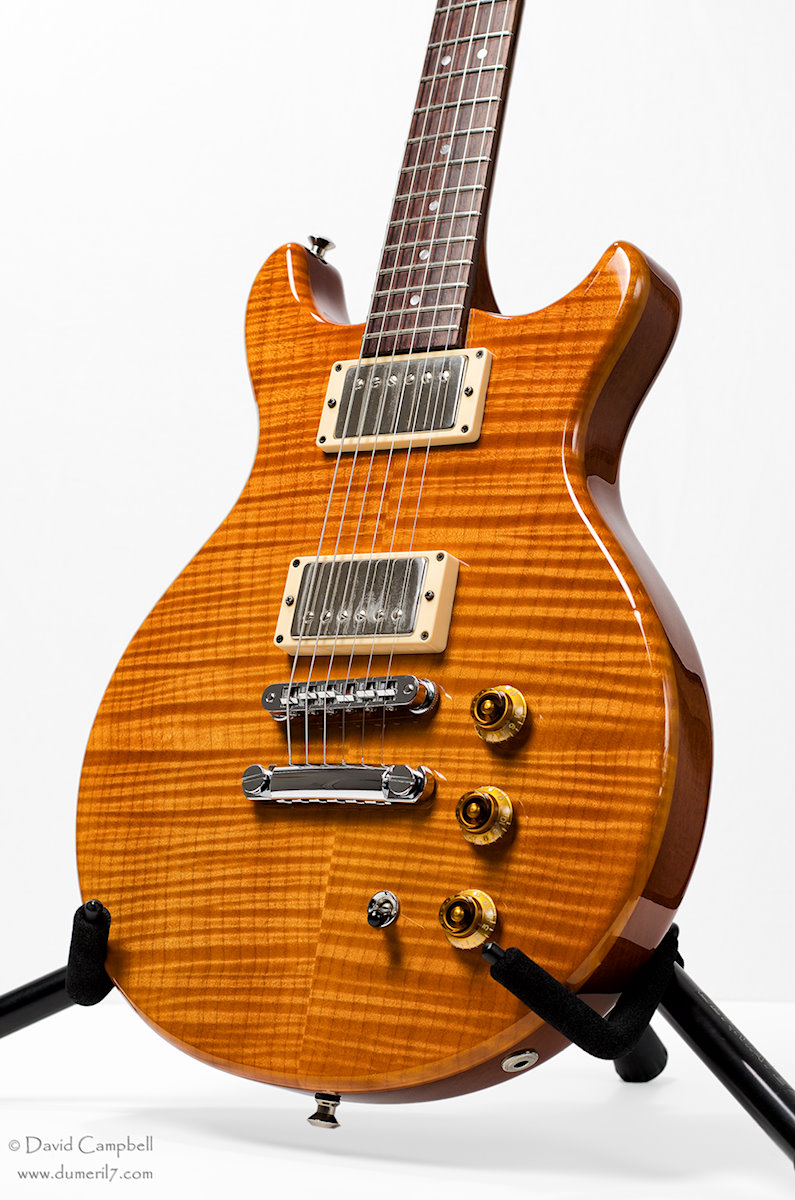
Today I present the Hamer Special FM. The Special FM is basically a slab-cut Les Paul. It has the classic Les Paul formula of dual humbuckers, mahogany body and neck, and a maple top. It varies from the formula with a double-cutaway shape and a control configuration of two volumes, a master tone, and a 3-way toggle placed on the lower bout.

Unfortunately, Hamer USA shut down operations at the end of 2012, an all-too-common fate of small companies acquired by bigger ones. US-made Hamers were great instruments with excellent woods, top-shelf parts, and superb fit and finish. In fact, I posit that US-made Hamers had more consistently high levels of craftsmanship than Gibsons, which have been pretty spotty in my experience. That said, there is a sound, versatility, and vibe with a good Les Paul that is pretty unique and I don’t think has been perfectly duplicated by other guitars, including Hamer.


I bought this guitar 20 years ago (for about $900!) and as you can see it's still in fine shape. It has a few surface scratches and the pickup covers are starting to develop a patina (a drawback or advantage of nickel-silver, depending on your perspective). I swapped out the original Duncan JB/'59 pickups for Duncan Seth Lovers, which are particularly authentic reproductions of '50s era Gibson PAF pickups. They're low in output, warm but articulate, and open-sounding in an almost singlecoil way – like a PAF should be. All of which adds up to a vintage Les Paul type of sound; not exactly a Les Paul but pretty close. I would say my Hamer is not quite as fat sounding overall as a good LP, which makes the neck pickup sound a little less muddy but the bridge pickup a little less muscular. You win some, you lose some.
I should also mention that for whatever reason, the tone control in this guitar is particularly good sounding. Instead of making the tone progressively more woolly/muddy, it has a sort of filter effect almost like a more subtle, cocked wah pedal. Now, typical guitar tone control circuits are in fact similar to wah pedals, being low-pass filters with a resonant peak. But for some reason it's more pronounced in this guitar than in any other that I've played. It gives this guitar a ton of character – in a good way. I like it so much that I've tried unsuccessfully to re-create this tone control in other guitars. There's nothing special about the circuit – it's a standard master tone control with a typical capacitor value – but the way it sounds is unique.


I have only two real criticisms for the Special FM. The first is that the body shape with short horns makes the guitar just a tad neck-heavy when balanced either on a strap or when sitting. The second is that the single master tone control, as good as it sounds, loses a bit of versatility versus the individual tone controls of a Les Paul. A good, vintage-style Les Paul is a surprisingly versatile instrument, going from juiced-up Tele, to warm and dynamic blues, to squawking, to roaring beast, all with just small adjustments to the guitar's controls. And a significant part of that is due to the 4-knob control layout.

Photogeek talk. I wouldn't call working with white seamless backdrops hard, but there are some things you have to know to get "that look". It all stems from the need to expose the backdrop evenly and well so that it's actually white (or close to it) while at the same time not over-exposing your subject.
First, it's easiest if you have a lot of room. The reason is because you generally want to light the subject separately from the backdrop and you don't want the two lighting setups interfering with each other. In order to maintain that separation, you often need to set up flags to block light from going where you don't want it to go. The smaller your working area, the more likely flagging will be necessary.
To light the background evenly, you usually want to use two lights with full coverage of the background shown in the camera frame and point them at the backdrop from 45 degrees angles and pointed at the opposite side of the backdrop from where they're placed. That gets the best, uniform coverage. For my guitar photos I used a single backlight because I thought I was working with a small enough area that I could get away with it, but you can see in some of the photos that there's a gradient in the white from one side of the photo to the other. That's not necessarily a bad thing, you might want that look. But for even white all the way across, use two lights.
Next, you want the background to be well-lit, but not so much that it reflects too much light - or too big of a light - back on the subject. Otherwise, you get this "glowing" effect that you may not want. In order to do this, the backdrop should be placed at a distance so that it just fills the camera frame, but not much bigger. Then place the subject at a distance so that it is the desired size in the frame. This keeps reflected light from the backdrop from wrapping too much around the subject. Maintaining these distances is one reason you need a lot of room to work with white seamless. If you don't have that much room (and my studio doesn't) then your background lights should fully cover backdrop that is shown in the camera frame, but not too much more (you'll have to spill some light outside the frame in order account for light fall-off but just don't over-do it). Finally, light the background (without the subject) so that it's fully exposed as white but not heavily blown out. The histogram should show all the pixels bunched up on the right, but not everything on the last vertical line. Then light the subject as appropriate.
I used this guitar for some of the rhythm tracks on my first CD and they ended up being the songs that had the best guitar sounds on the record. Those tracks have a punchier, meatier sound that's missing from the other tracks.
Photogeek talk. I wouldn't call working with white seamless backdrops hard, but there are some things you have to know to get "that look". It all stems from the need to expose the backdrop evenly and well so that it's actually white (or close to it) while at the same time not over-exposing your subject.
First, it's easiest if you have a lot of room. The reason is because you generally want to light the subject separately from the backdrop and you don't want the two lighting setups interfering with each other. In order to maintain that separation, you often need to set up flags to block light from going where you don't want it to go. The smaller your working area, the more likely flagging will be necessary.
To light the background evenly, you usually want to use two lights with full coverage of the background shown in the camera frame and point them at the backdrop from 45 degrees angles and pointed at the opposite side of the backdrop from where they're placed. That gets the best, uniform coverage. For my guitar photos I used a single backlight because I thought I was working with a small enough area that I could get away with it, but you can see in some of the photos that there's a gradient in the white from one side of the photo to the other. That's not necessarily a bad thing, you might want that look. But for even white all the way across, use two lights.
Next, you want the background to be well-lit, but not so much that it reflects too much light - or too big of a light - back on the subject. Otherwise, you get this "glowing" effect that you may not want. In order to do this, the backdrop should be placed at a distance so that it just fills the camera frame, but not much bigger. Then place the subject at a distance so that it is the desired size in the frame. This keeps reflected light from the backdrop from wrapping too much around the subject. Maintaining these distances is one reason you need a lot of room to work with white seamless. If you don't have that much room (and my studio doesn't) then your background lights should fully cover backdrop that is shown in the camera frame, but not too much more (you'll have to spill some light outside the frame in order account for light fall-off but just don't over-do it). Finally, light the background (without the subject) so that it's fully exposed as white but not heavily blown out. The histogram should show all the pixels bunched up on the right, but not everything on the last vertical line. Then light the subject as appropriate.
Comments
Post a Comment