5 No-Cost Ways To Improve Your Photos
I was thinking the other day about simple things I've learned that would have made more of my life's snapshots turn out better. I
have tons of photos that bring back wonderful memories for me, but are meaningless to
anybody else because they're just your run of the mill, out-of-focus, over-/underexposed pictures
with crummy composition. Its hard for somebody who doesn't have the associated memories to connect with that. I offer you therefore 5 ways to improve your
pictures without investing money in an expensive camera, lens, or fancy gadget.
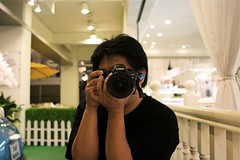
Hold Your Camera Properly. Probably the most common reason that personal snapshots are blurry is because the photographer moved the camera while taking the picture. Just holding the camera properly will instantly increase the percentage of good photos that you take. First, consciously think about what you're doing; don't just jerk the camera up and snap pictures. Treat it like a sport that relies on proper form (archery, golf, beer pong, etc.) and be deliberate and consistent every time. So how do you actually hold the thing? For standard landscape orientation: Right hand wrapped around the side with the index finger on the shutter button, and the left hand, palm up, cradling the camera and lens from underneath working the zoom and focus of the lens. Both hands should be supporting the camera! Hold the camera firmly to your head. And here's something really important: You want your elbows tucked into your abdomen, not out to the sides like you're doing the chicken dance. This provides more stability to keep the camera still. Feet are placed to provide your body the most stable platform -- shoulder width apart or more and placed under your center of gravity. Some people like to have one foot forward. Even better, lean against a solid object to keep your body still. Compose the shot, press the shutter button halfway to lock focus and exposure, then exhale and hold your breath. Then finally, press the shutter button in a smooth, even motion (like you're firing a rifle, if you've ever done that) -- don't mash your finger down. At slow shutter speeds a jerky shutter finger will jar the camera enough to blur the image.
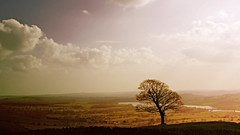
 Have a Subject. I often take photos just to learn, experiment, or improve my ability with some technique. And in these photos, what I'm taking a picture of doesn't matter as much as having the right qualities or conditions (lighting, distance, contrast, etc.) to aid in the learning experience. That's all fine, but "keeper" photos almost always need a definitive subject. Without a subject, a photo is boring. An obvious exception is a landscape, but even then the landscape needs to be compelling enough to stand on its own as a subject. A marginally interesting landscape gets mighty boring when collapsed to 2D. There's another great reason to have a definitive subject in your photos: A subject gives you a single object to focus on. Without a subject, it won't be clear to the audience what they're supposed to be looking at, and it will seem like a mistake when not everything in the photo is sharp. With a subject, if you get that sharp, everything else can be out-of-focus and you'll still end up with a good photo. Try it, you'll see what I mean.
Fill The Frame. For some reason, we tend to include a lot of foreground and background in our photos. Often you'll get a more compelling picture by closing in and displaying very little other than the subject. There are plenty of exceptions. For example, maybe you're specifically trying to show some kind of relationship between the subject and the foreground/background. But if the subject is the primary focus, then filling the frame is a good idea.
The Rule Of Thirds Works. Really it shouldn't be called a "rule" because rules imply you're doing something wrong if you don't follow them. This is more of a tip, which are just good ideas that often lead to nice results. The Tip Of Thirds isn't very catchy sounding though. The Rule Of Thirds goes like this: Imagine dividing the frame up into equal thirds, both horizontally and vertically, so that the image area is a 3x3 matrix. Place the subject(s) of your photo at or near the intersection of the imaginary lines dividing the sections. The natural tendency is to place subjects in the center, but placing them at the intersections usually makes for a more engaging photo. If the subject is looking to one side or moving, place him so that he's looking to, or moving towards, the side of the frame with more open space.
Focus On The Eyes For portraits of people and animals, if the eyes are sharp the photo will work even if everything else is soft. So use your newly acquired camera holding technique, aim your camera's focus point at the eye that is closest to you, and fire.
Hold Your Camera Properly. Probably the most common reason that personal snapshots are blurry is because the photographer moved the camera while taking the picture. Just holding the camera properly will instantly increase the percentage of good photos that you take. First, consciously think about what you're doing; don't just jerk the camera up and snap pictures. Treat it like a sport that relies on proper form (archery, golf, beer pong, etc.) and be deliberate and consistent every time. So how do you actually hold the thing? For standard landscape orientation: Right hand wrapped around the side with the index finger on the shutter button, and the left hand, palm up, cradling the camera and lens from underneath working the zoom and focus of the lens. Both hands should be supporting the camera! Hold the camera firmly to your head. And here's something really important: You want your elbows tucked into your abdomen, not out to the sides like you're doing the chicken dance. This provides more stability to keep the camera still. Feet are placed to provide your body the most stable platform -- shoulder width apart or more and placed under your center of gravity. Some people like to have one foot forward. Even better, lean against a solid object to keep your body still. Compose the shot, press the shutter button halfway to lock focus and exposure, then exhale and hold your breath. Then finally, press the shutter button in a smooth, even motion (like you're firing a rifle, if you've ever done that) -- don't mash your finger down. At slow shutter speeds a jerky shutter finger will jar the camera enough to blur the image.
 Have a Subject. I often take photos just to learn, experiment, or improve my ability with some technique. And in these photos, what I'm taking a picture of doesn't matter as much as having the right qualities or conditions (lighting, distance, contrast, etc.) to aid in the learning experience. That's all fine, but "keeper" photos almost always need a definitive subject. Without a subject, a photo is boring. An obvious exception is a landscape, but even then the landscape needs to be compelling enough to stand on its own as a subject. A marginally interesting landscape gets mighty boring when collapsed to 2D. There's another great reason to have a definitive subject in your photos: A subject gives you a single object to focus on. Without a subject, it won't be clear to the audience what they're supposed to be looking at, and it will seem like a mistake when not everything in the photo is sharp. With a subject, if you get that sharp, everything else can be out-of-focus and you'll still end up with a good photo. Try it, you'll see what I mean.
Fill The Frame. For some reason, we tend to include a lot of foreground and background in our photos. Often you'll get a more compelling picture by closing in and displaying very little other than the subject. There are plenty of exceptions. For example, maybe you're specifically trying to show some kind of relationship between the subject and the foreground/background. But if the subject is the primary focus, then filling the frame is a good idea.
The Rule Of Thirds Works. Really it shouldn't be called a "rule" because rules imply you're doing something wrong if you don't follow them. This is more of a tip, which are just good ideas that often lead to nice results. The Tip Of Thirds isn't very catchy sounding though. The Rule Of Thirds goes like this: Imagine dividing the frame up into equal thirds, both horizontally and vertically, so that the image area is a 3x3 matrix. Place the subject(s) of your photo at or near the intersection of the imaginary lines dividing the sections. The natural tendency is to place subjects in the center, but placing them at the intersections usually makes for a more engaging photo. If the subject is looking to one side or moving, place him so that he's looking to, or moving towards, the side of the frame with more open space.
Focus On The Eyes For portraits of people and animals, if the eyes are sharp the photo will work even if everything else is soft. So use your newly acquired camera holding technique, aim your camera's focus point at the eye that is closest to you, and fire.


say, this is great. Thanks! - middlerage
ReplyDeleteThanks. This really helpful. Especially the first point.
ReplyDelete